Showing posts with label Farkles. Show all posts

Tuesday, July 28, 2015

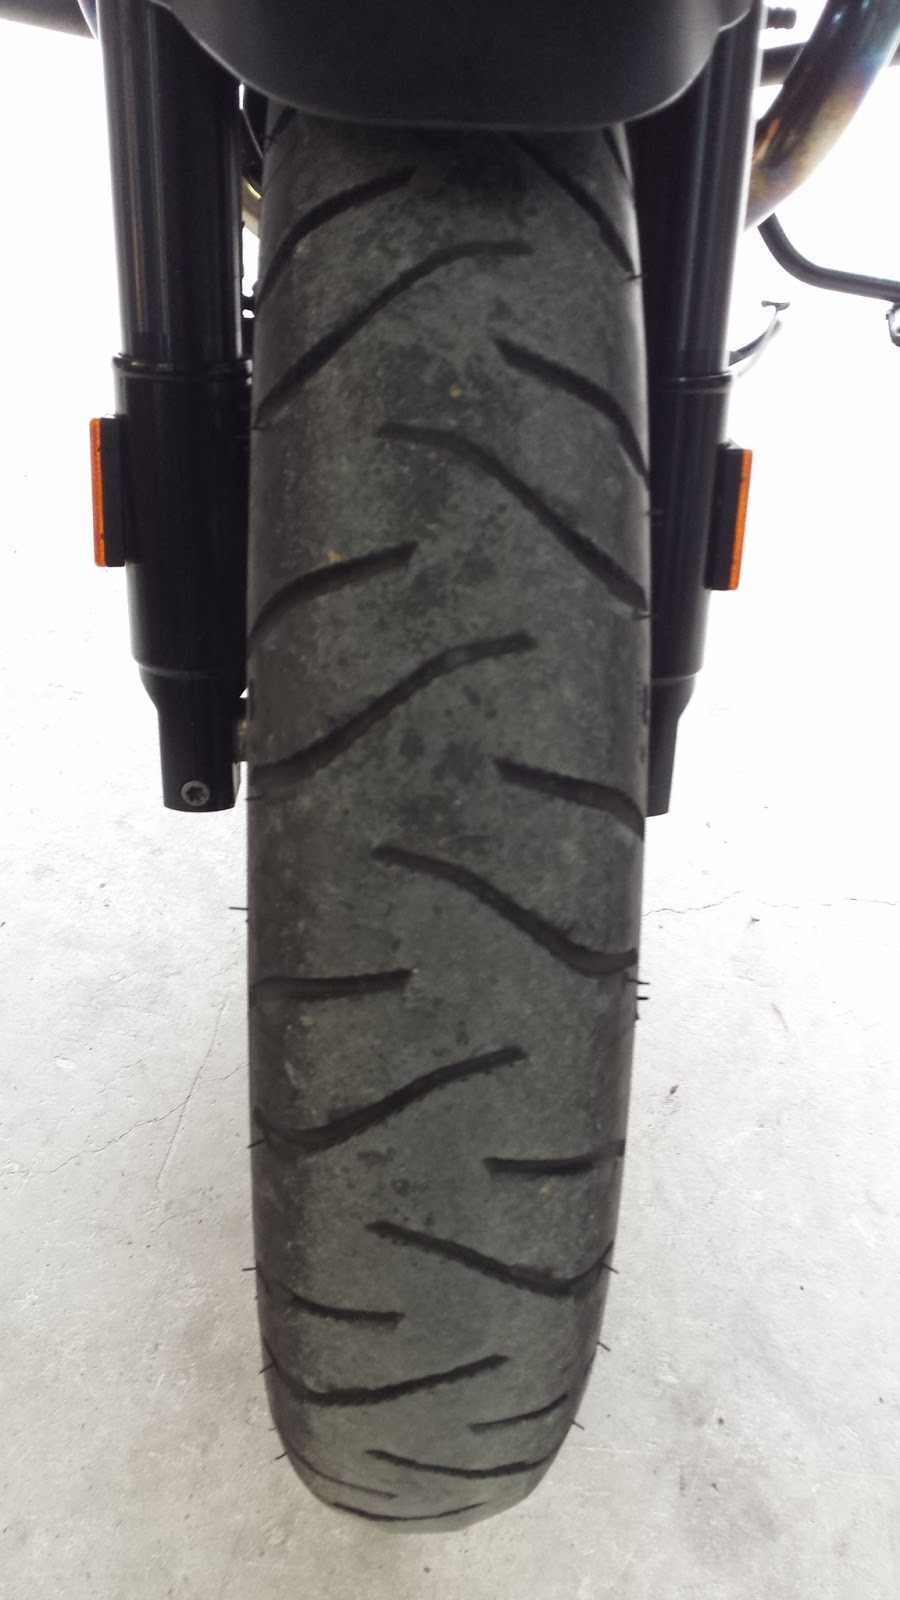
Michelin Anakee 3

August 28, 2015 - 119,492 Odometer Miles

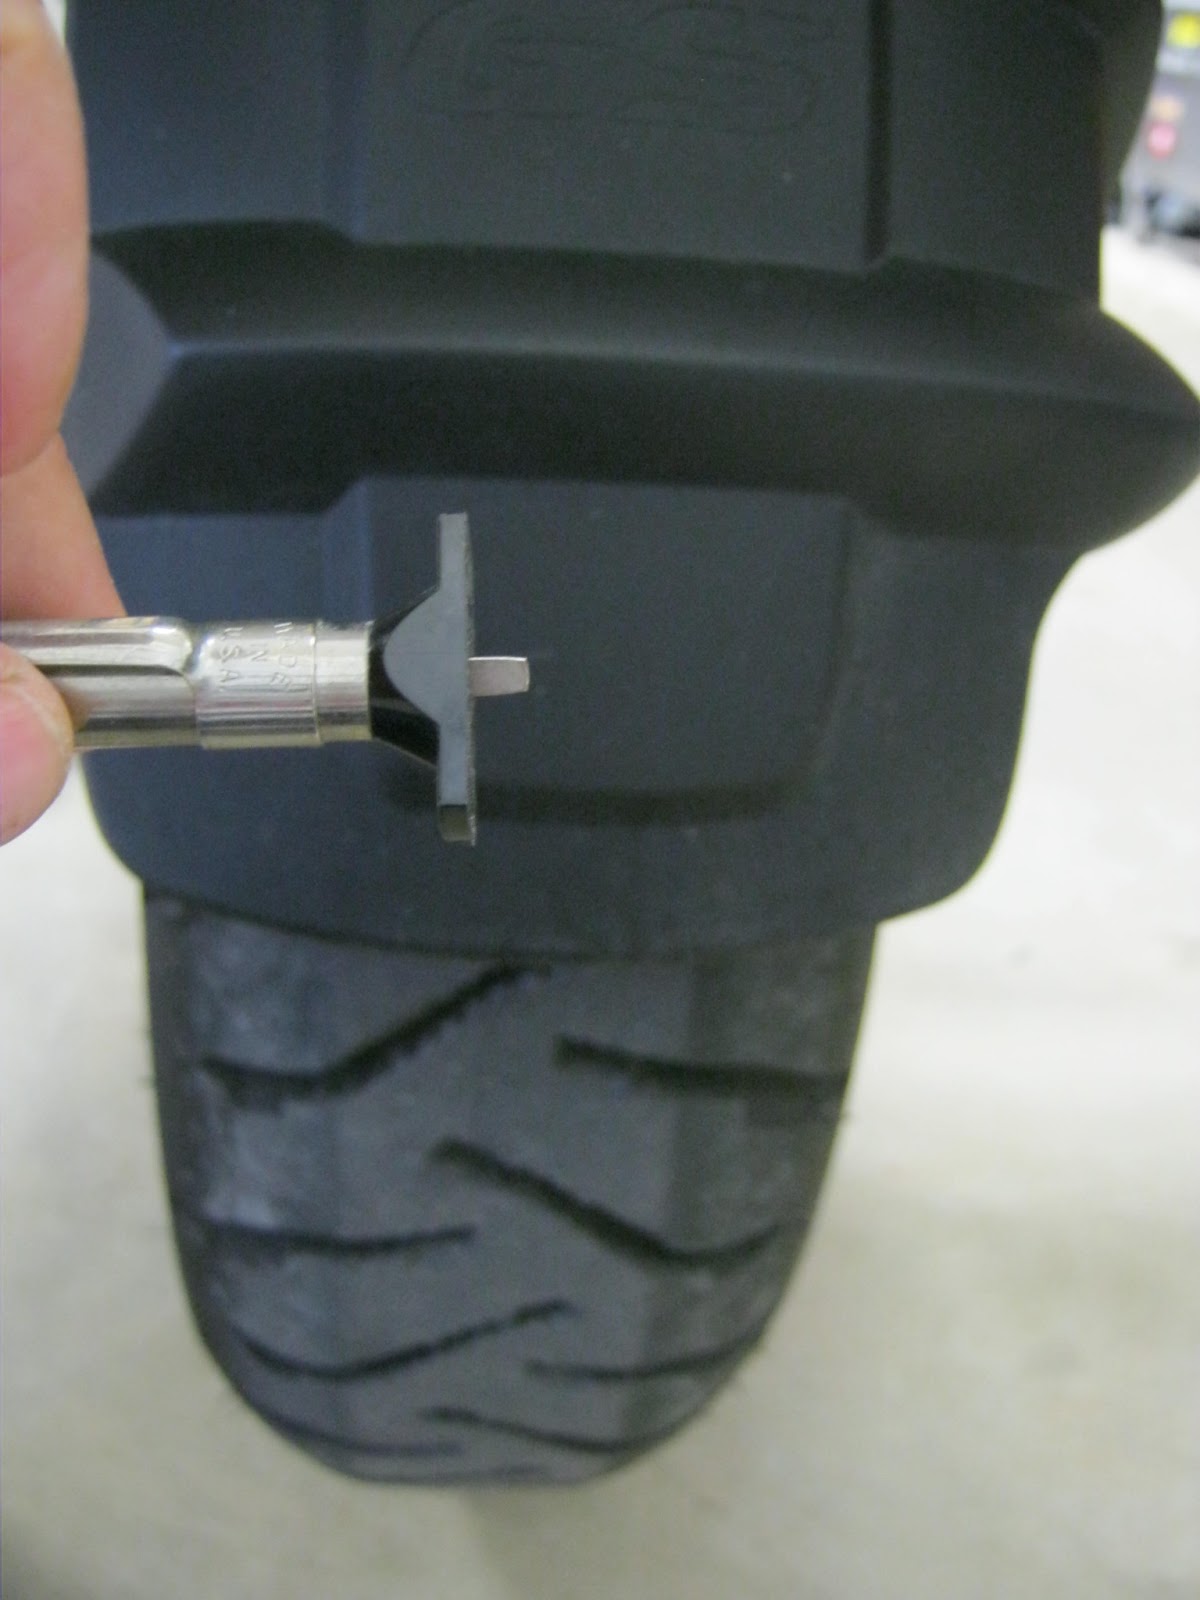
Installed a new set of Anakee 3s today with a total of 12,362 miles on the old set.  This includes those ridden in the 2015 Iron Butt Rally.  I'm getting ready to ride to Kingsport TN for the IBA Regional Gathering event.  So, I needed more miles than remained on the old set.

Well, the Anakee 3's did well for me in the 2015 Iron Butt Rally.  I put them on prior to riding to Albuquerque, NM, rode the some 10,390 miles in the Rally than back home to Wimberley, TX.  I'm still riding on the tires and will probably put another 2,000 to 3,000 miles on them before I get a new set.  I'll post the video when I change them out.

During the IBR I had occasions to ride the Anakee 3's down miles of dirt roads.  One was a 45 mile shortcut from Utah to Idaho and the other was in Colorado.  The tires did their job splendidly.

June 15, 2015 -- 107,130 Odometer

I'm riding in the 2015 Iron Butt Rally, "World's Toughest Motorcycle Rally" at the end of June.  So, I'm mounting a new set of Anakee 3's on the GSA.  Even with riding from home in Texas to the IBR start in Albuquerque, doing the 11,000+ in the rally, I expect to have plenty of tread back home to Texas. The video is of the set I put on back in November.  Since then I have ridden several IBA rides, including The George A. Wyman Memorial Grand Tour, at full rally trim, on that set of tires.  As you can see, with 15,582 miles on them there is still some tread left.  No wear-bars showing and just the normal wear pattern one would expect.  I'm confident I can ride the new set for the entire IBR, baring any road hazard damage.  This time around I have a fully functional Tire Pressure Monitoring System and a backup, to avoid the near catastrophe I experience during the 2013 IBR, see below.


November 7, 2014 -- 91,548 Odometer

I'm having two new Anakee 3's mounted today after a few months of Hard Riding Adventure.  One of those adventures riding to California to have new Wilber shocks installed.  They seemed to help with the front tire wear pattern and rough ride.  But, one might expect new shocks to make the ride a little smoother.  None the less, the wear pattern is still visible after 16,003 miles.  I am still very satisfied with the performance of the Anakee 3 sport touring tire.  I will be using them again in the 2015 Iron Butt Rally.


July 19, 2014 -- 75,545 Odometer Miles

Rear - 14,778 Miles
Front - 14,778 Miles
Just returned from doing the Earth to Moon BunBurner Gold ride.  At the start of the ride I had a little over 11,500 miles on the current set of tires. I wanted to see how they would hold up under BBG riding conditions.  I have a new set in the garage ready to be mounted when the bike goes in for service next week.  Also, I'm replacing the stock ESA shocks absorbers and springs with a set of Wilber's.  It will require me to send the shock assembly out to California so WilbersAmerica can take out the stock BMW Showa absorbers and springs and install the Wilber's with new springs matched to riding weight. Watch Ted Porterdo the Wilber ESA Conversion procedure.  The cost difference between front and rear BMW stock replacement ($4,037 p/l) and Wilber ESA conversion ($1,349 plus shipping) is astounding.  I'm hoping a new set of shocks will have a positive effect on the wear pattern of the front tire, as it was getting a little "knobby" feeling.  As for the rear, well, at almost 15,000 miles I couldn't be happier with the results given how hard I ride.  Almost all of the mileage on this set has been on paved roads of all types.  If you have any questions, feel free to make a comment.  


March 6, 2014 -- 60,767 Odometer Miles

Rear - 11,780 Miles
Front - 11,780 Miles
Yesterday I had a 60,000 mile service at Lone Star BMW.  Today, I had a set of Anakee 3 tires mounted on the GSA.  I replaced the tires earlier than I would have normally.  The current set had only  11,780 miles on them.  But, I'm getting ready to put about 6,000 miles on the bike before the 24th of this month.  I'm riding to Jacksonville FL to attend the annual IBA Dinner meeting then back home.  Then I have to attend a professional development conference put on by Harley-Davidson's Riding Academy, in Las Vegas NV.  As you can see by the pictures below they still had a couple thousand miles left on them.


 August 13, 2013 -- 48,987 Odometer Miles

Had a set of Anakee 3s mounted today.  I have decided to replace front tire every time with a new rear tire from now on.  By the time the rear tire needs replacing the front tire still has lots of miles left on it but the wear pattern is starting to become irregular.  This makes keeping the front tire through another cycle of rear tire problematic.  So, two new tires every time from now on.

I fitted each wheel with a different tire pressure mounting system.  Gone are the TireWatch internal sensors that caused me so much trouble.  They didn't work while I was on the IBR.  I purchased as set of TireGard TPMS.  The sensors mount on the valve stems on the outside of the wheel.  I'm using metal valve stems for added strength and stability.  As it turned out the weight of the metal valve stems and the sensor brought the tire into balance eliminating the need for added balancing weights.  The sensors work good.  No issues there.

The primary function I want a TPMS system to provide me is notification of a sudden drop in tire pressure.  I want a visual alert dramatic enough to get my attention so I can get the bike stopped before I compromise the integrity of the tire.

I am not impressed with the TPMS monitor though.  It is a small devices which looks like it should be attached to ones key chain instead of mounting on a motorcycle.  The low pressure "audible" alarm is impossible to hear when the motorcycle is moving while wearing a full face helmet.  The "vibration" indicator is undetectable if the unit is mounted to the motorcycle.  The "visible" flashing indicator is tiny and difficult to see when starring directly at it and undetectable in ones peripheral vision.  The unit back light does come on when the tire pressure is low but unless it's night, that also is undetectable.  AND, it these none motorcycle friendly attributes weren't enough.....the monitor unit IS NOT WATERPROOF!  But, it's better than nothing.  I'll have to get some experience using the TireGard system.
 

July 4, 2013 -- End of Leg 1, 2013 Iron Butt Rally

I was so looking forward to riding the Anakee 3s for the entire rally. But it wasn't to be.  During Leg 1, coming out of New York City, on the NJ Turnpike, around 10pm, somewhere, the rear tire got punctured.  With the traffic noise, especially the big truck next to me, and the irregular surface of highway I didn't catch that I had a rear tire problem.  The Anakee 3s have such a stiff sidewall that at 70 MPH I didn't feel the customary shimmy in the rear end that a flat tire usually gives. Oh, what about the tire pressure monitor system?  Hadn't worked since I left home.

At any rate, I got the bike out of the flow of traffic.  Quickly found the puncture sans object.  Plugged it up with a gummy-worm and was on my way.  I was due to start an 8 hour rest bonus so I rode the bike to the eastern end of the PA turnpike and got a room. The next morning I checked the tire pressure, added a couple of pounds and headed down the turnpike to collect the string of bonuses along the way back in time for the 8pm check point just north of Pittsburgh. The rear tire was not right. I must have ridden it too long without enough pressure before getting it plugged up.  It was compromised, out of round and getting worse.  I know I would have to replace it anyway but now I was anxious it would last me back to the check point.  It was Independence Day and nothing was available until after 9:30am Friday morning.  Going over my options to get back on the road for Leg 2, starting at 6am Friday, I was  thinking I would have ride the bike to the BMW dealer a few miles away from the check point and spend the couple of hours to get a new rear tire.
 
I had just scored the last bonus along the PA turnpike when "POW"....the rear tire blows!  Kevin Lechner was just passing me and he must have heard the tire blow because he pulled over into an opening after the shoulder barriers.  Again, the stiff side walls of the Anakee 3 made getting the motorcycle stopped safely easy work.  I pushed the bike to the open, put it up on the center stand and checked out the rear tire.  Yup, it blew out.  Kevin offered to stay and help but I suggested he head for the check point.  It was just a little after 4pm and I had plenty of time before the 8pm mandatory check point time.  I was 18 miles from the hotel.

Settle down, it'll all be clear
Don't pay no mind to the demons
They fill you with fear
The trouble it might drag you down
If you get lost, you can always be found


Just know you’re not alone
Cause you can always call Lisa's phone

I called the Rally Master, Lisa Landry, and informed her of my troubles.  She did her magic cause inside of 10 minutes I got a call from some guy wanting my location grid coordinates.  He was bringing me a wheel off of his buddies GSA to get me back to the hotel.  It seems Jeffrey Smith and Scott Aucr, from MI, where hanging out in the parking lot at the hotel taking in all the sights when Tobie Stevens, maybe, I'm not sure, approached them about a rider needing help.  Within the hour I was back on the road heading to the check point.  My spirits began to soar as I could see my way back in the game.  I still faced a significant delay starting Leg 2.  Getting a new rear tire would add about 5 hours to my start if everything went right.

Pulling into the hotel parking lot I see Roger Sinclair waving me down and motioning for me to ride over to the back end of the parking lot.  Roger Sinclair, 4th place 2011 IBR finisher, is one of those mechanical geniuses who instantly see the mechanical solution.  And, Roger is one of the nicest guys you would ever want to know.  But, anyways, he motions for me to park under the EZup where I figure they want to swap out my wheel for the borrowed one I had on the bike.  I dismount, put the GSA up on the center stand and moved to get my tools out to remove the borrowed wheel.  I could hardly get around to the pannier to get them when Roger's buddy, George Uber Alles was removing my wheel.  Just then Roger asked if I had a tire.  I told him no and of my plan to get one from the local BMW dealer in the morning after the start of Leg 3. "Nonsense!", he says as he points to a pile of new tires near George's truck.  "Would a Metzler Tourance be ok?" he asks me.  I instantly gave him my best bear hug as I almost broke into tears.

Inside  of 20 minutes I had a new tire mounted on the my wheel, balanced and back on the bike.  I chatted with Jeffrey and Scott about how fortunate I was that they had rode down from MI to be at the check point for the end of Leg 1.  I thanked them both profusely.  Got their names and addresses so I could buy each of them a subscription to Iron Butt Magazine.   George jotted down the cost of the tire on one of his cards for me.   I had my friends at PayPal send him significantly more money than he was asking for the new tire, as soon as I got back home.

Wow!  I was overwhelmed with gratitude at how my misfortune with a common road hazard had turned into such a positive experience for me.  During Leg 2 I moved up in the standing from 63rd to 30th place. This was only possible because of generosity, sense of urgency and willingness to help a rider, I experience from the LD community.

I publicly and personally thank Lisa Landry, Rally Master, the army of volunteers who got the recovery ball rolling, IBR spectators Jeffery Smith and Scott Aucr who supplied the GSA wheel and brought it to me as I was stranded on the road.  Special thanks to Roger Sinclair and George Uber Alles who took time off from their day jobs to be at the IBR hotel, with all their tools, equipment and spare parts, just in case some stranded IBR rider need them. I am very grateful.  Well done, Comrades!


June 20, 2013 -  35,302 Odometer Miles

Had a new set of Anakee 3s mounted today.  These are the tires I will be using in the Iron Butt Rally.  I will ride the 1,447 miles from my home near Wimberley, TX to Pittsburgh, PA, with an over night stop in Memphis, TN.  I expect to ride about 11,000 to 12,000 miles in the IBR.  So baring any road hazards along the way the Anakees should hold up for the entire rally.  I got 14,000 miles riding from home, the 2011 IBR, and back home on Anakee 2s.  If I experience a road hazard or excessive wear for some unanticipated reason, I'll just pay the price of a tire change on the clock.  Decisions...decisions....it comes with the ride.  At any rate, I'll post what the tires look like after the IBR is completed, 12 July.  

May 25, 2013 -- 35,055 Odometer Miles

Front Tire -- 22,955 miles
After completing an in-state 10/10ths IBA certification ride I now have  22,955 miles on the front Anakee 3 I mounted at 12,100.  As you can see from the high resolution picture there is some irregular ware but not as much as I experienced on the Anakee 2 at around the same point.  There is still lots of tread available for safe riding.  The Anakee 3s are noisy but not as much as the Anakee 2s.  The rear tire has a little over 10,000 miles on it and still has lots of life left.  During the 10/10ths I road over every kind of road and highway available in Texas.  Including lots of rough chipset roads in west Texas not well traveled by the public. 
Rear Tire -- 10,554 miles
The goal of this experiment was to give me confidence I could use the Anakee 3s during the Iron Butt Rally without having to replace the rear tire during the rally.  As of this writing I am confident, absent road hazard damage, I can leave home with a new set, travel to Pittsburgh, and ride the IBR without worrying about a tire change. I got real good mileage out of the Anakee 2 "V" during the 2011 Iron Butt Rally with over 14,000 miles on the rear tire.  So, riding on a set of Anakee 3's works for me.


April 26, 2013 -- 24,579 Odometer Miles 

As of this date I have put 12,479 (24,579 - 12,100) miles on the Anakee 3s.  And, I am very happy with the performance and handling.  I've ridden several times in wet conditions, including during the Cape Fear Rally, and the handling has been great. 

As you can see from the high resolution pictures below there is still plenty of tread and good water channeling grooves throughout the contact patch.  I measured 4/32 (3 mm) on the rear tire in the center at one of the lowest channels I could find.  Judging by the profile of the tire there is not much flatting of the contact patch area.  I would not hesitate to put a couple thousand more miles on the rear tire.  The front tire shows just a little wear as you might expect.  The uneven wear pattern characteristic of the Anakee 2 front tire is not much of an issue on the Anakee 3.  I'm getting ready to do a 10,000 miles in 10 day training ride next week so I'll replace the rear but leave the front on the bike.  I'll post a couple of pictures of the front when I get finished with the ride.   


March 23, 2013 --  19,360 Odometer Miles

I'm back home after a the going to Jacksonville FL for the IBA annual dinner and doing the 100ccc (plan) coast to coast to coast challenge ride.  I really like the Anakee IIIs.  Handling is great and the new tread design seems less noisy and smoother than the Anakee IIs.  Cornering, dry or wet, is rock solid.  And, I did notice better handling in the couple of times I went off pavement into the loose stuff.

After riding in the 100ccc (report) I want to document the wear on the tires.  I rode the 100ccc in full rally trim (weight) to duplicate the stresses on the tires I might encounter while in the IBR.  I have the tire pressure set at 38/44 PSI front/rear and endeavoured to maintain this pressure for the most part.  So, after 7,260 miles (19,360-12,100) this is what the tread on the rear look like.  I measured 6/32 (4.5mm) at the center of the tread. On the front tire there is hardly any noticeable wear.


I'll continue to document the performance of these tires here so check back from time to time.  I plan on riding the current set in the Cape Fear 1K the middle of April.  I'm hoping to put another 7,000 to 8,000 miles on them before the 10/10th I'm planning to ride in May.  Need a fresh set for that training event.  The event will be on a mix of Interstate highways and secondary roads. So, it will be a good workout for them and a closer match to the various pavement surfaces and speeds I'll encounter in the IBR in July.


March 6, 2013 -- 12,100 Odometer Miles

Today I had mounted Michelin Anakee III "V" front and rear tires on the BMW R1200GS Adventure.


I got real good mileage out of the Anakee II "V" during the 2011 Iron Butt Rally with over 14,000 miles on the rear tire.  So, trying a set of Anakee III's seems a no-brainer.

I'm riding to the Iron Butt Association annual dinner in Jacksonville FL the weekend of 15 March.  On Sunday, March 17, I'll depart Jacksonville FL for San Diego CA and back to Jacksonville, FL all in under 100 hours.  This will be a good test of how the tires wear on the Interstates.  All totaled it will be about 7,000 miles back home.  I'll post a video below of the tire wear when I get back around the 22nd.

Wednesday, June 11, 2014

The BunBurner Gold Trifecta + Insanity

Ride 1,500+ miles in less than 24 hours multiple days in a row

WARNING:  This Xtreme! motorcycle event is being performed by an experienced, but still amateur, long distance motorcyclist, on the public highways, actively observed by LEO of multiple jurisdictions, in whatever weather and traffic that happens along the route, without permission, endorsement, authorization, encouragement, or even a note from his Mother! 

Greg Rice is one of my IBA comrades.  He has asked me to be his turn around witness while he rides the BunBurner Gold Trifecta, the weekend of June 14.  This Iron Butt Association certified challenge ride consists of three consecutive BBG's.  Each of the three BBG must exceed 1,500 miles and be ridden in less than 24 hours.  He may do a 4th BBG if he's feeling good.  This blog posting is a peak inside the extensive planning, preparations and conditioning required, to maintain the consistent ride pace, manage resources, rest and risks, to be successful.  You can follow along with Greg via the SpotWalla map below.

SpotWalla Map -- Click this link to see Greg's full map.
Where's Tim

(During Greg's BBG Trifecta attempt I will be posting updates, pictures, and ride following observations below, with the latest posting at the top.Current Weather Maps

Congratulations!  He did it....and with the style and flare we've come to expect from Travel_Man


Tue 2310:  Success!  Greg arrived at the Ely finish with  time to spare. 
Tue 1915:   As Greg approaches the AZ/NV border he is entering the final stretch to the Ely finish.  It's about 270 miles and around 3:30 to the conclusion of the BBG Quattro.  Still has to negotiate rush hour traffic through Las Vegas, but I wouldn't expect that to be too tough of a challenge give what Greg has accomplished so far.   
Tue 1200: It is just 1000 as Greg approaches Albuquerque and hopefully rush hour traffic is winding down.  Greg slept in an extra hour before heading out on his 4th BBG.  He wanted to maximize his rest after the Trifecta.  His start DBR at Junction was around 0215 CDT.  Ely, NV is PDT. So, he needs to arrive at the finish by around 2300 PDT to be within the 96 hours from the 0200 EDT start on Saturday .  At his demonstrated pace that would afford him a couple hours of slack time,
Tue 0307:  Behold, The BunBurner Gold Quattro!  By now you may have deduced this epic IBA challenge ride was going to turn out to be something more than just another BBG Trifecta.  In the works and planning for some time, Greg got the blessing from Mike K to attempt, and if successful, submit for certification the Quattro.  That was back in March while he and I attended the IBA Annual Dinner.  Greg invited me to help when I suggested the name for this 'proof of concept' ride.  So, if Greg makes it to Ely, NV before 0315 EDT Wed he will have moved the BBG class bar up a notch.  But, hold the applause.  It is still subject to Mike's approval before the Quattro gets put on the IBA challenge ride menu. 

Mon 2130:  Trifecta Perfecta!  Number three is in the baggie filled with DBRs.  Oh yeah, and the witness forms.  But wait!  What now?  I guess the same old same old... refuel, refresh, replenish then REST.  Four, tomorrow is another day!
Mon 1915:  West Texas is famous for its dramatic weather.  As it would happen a gully washer of some note hit Fort Stockton just as Greg was approaching.  He could see it on his on board weather radar, and he even hung out at Balmorhea for a bit.  By the time he got to Ft Stockton the water accumulation had flooded most of the low part of town.  A semi was blown over during the storm which closed the Interstate causing Greg to go around the mess, and right into the flooded areas.  He's working through the navigation issues and is trying to get back on track.  
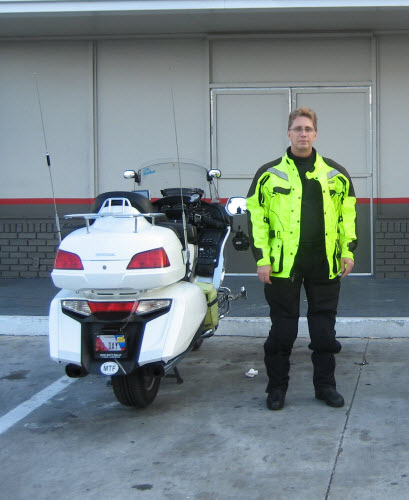
Mon 1500:  As Greg nears Deming NM he's about two thirds the way back to Junction.  By the time he finishes BBG3 he will been riding his Goldwing 60 hours since leaving his Florida start point.  Like many long distance riders Greg has made his motorcycle a 'comfort' zone.  What that really means is Greg has worked to eliminate all the issues that cause 'comfort' stress.  Those annoying things that if not corrected will cause a distraction from the riding task.  Check out Greg's comfort farkles using 'The Machine' link below.
Mon 0215:  On the road again.  Same route, same plan.  This is the final leg of the BBG Trifecta, but not the end of Greg's ride.   

Sun 2130:  Two down and two, uh, I mean, one more for the BBG Trifecta.  Same routine as BBG one. Refuel, refresh, replenish and rest.
Sun 2000:  I arrived back at Junction after riding to Van Horn and back.  It was warm starting around 1300, and got up to 105f as the day wore on.  Greg was riding in some of the same temps.  I was trying out my new LDComfort skull cap.  Dry, not much of a comfort difference.  Wet, only slightly more comfortable.  I'll try it again in my Texas I-10 Solstice 'Day Ride' next Saturday and let you know if I will integrate the skull cap into my 'comfort' system.  I'm sitting at the gas station waiting on Greg to show up.  Last I checked he was near Ozona.
Sun 0900:  Happy Father's Day!  Greg is almost to Lordsburg NM with the morning sun to his back.  By the time he reaches the Tucson turnaround it will be mid day.  I'm going to do riding in the local area most of the day.
Sun 0202:  Start of BBG number 2.  Junction to Tucson to Junction.  Nine hundred miles of 80 mph and the rest of the 1,520 at 75 mph.  There will be less traffic on this leg than on the leg from Florida through to Junction.  It's going to warmer though.  Once he passes Ozona Greg will be riding in desert all the way to Tucson. 

Sat 2140:  Arrived Junction way ahead of schedule.  Must have had a tailwind most of the way.  Of course, Greg does manage his pace well.  Not for a quick refuel, shower and a Quarter Pounder with cheese and some fries from McD's.  This was the easy BBG.  Riding over 1,525 miles would be tough on most any rider.  But for the BBG Master it was a good days ride.   Arriving early means more sleep.
Sat 1330:  Making good time.  Must be the smooth traffic flow on I-10.  At this rate Greg will probably make Junction by around 2215 or so this evening.  I'm heading out towards Junction, leaving around 1600, going to take a scenic route.  Greg has already made motel reservations for the both of us.  I'll pick up the keys so he won't have to mess with check-in when he arrives.  My plan is to meet him at the gas pump when he arrives and do my witness duties as he refuels.  
Sat 0900:  Greg is off to a good start a couple minutes before 0200.  He made the JAX DBR corner about 20 minutes ahead of predicted time.  The weather ahead on I-10 is looking pretty good and he should make the Alabama border around 1130 EDT...or 1046.

Ride Itinerary:  The table below is a schedule for each leg of the event.  Each BBG is considered a leg.  Each leg is divided into segments based on time, speed and distance to key route points, like route corners and the turn-around locations.  These are my calculations based on the route Greg chose.  I applied his parameters for average pit stop time, planned rest periods and his anticipated riding time for each of the route segments.  See: BBG-Q Rally Leg Plan Tool (MS Excel)

Note:  Times are listed in EDT.  Same time zone as will be posted by Greg's Spot messages and tracks.  (DBR = Dated Business Receipt)

Planning:  Being successful at this kind of long distance ride takes meticulous planning.  Selecting a route, timing out arrival times to each key way point, gas stops, rest points and witness points involves using mapping software and customized applications.  He uses his own proprietary scheduling application to provide information about his ride pace, pit stops (refuel, refresh, repair) and rest stops.  Like many in the LD community Greg uses on board navigation, weather radar, real-time traffic,  and communications equipment.  Each leg of the entire route has been plotted, documented and uploaded to multiple GPS units.  Back up documentation and even paper maps are included.

Route  --  The basic route Greg selected is starting near his home in south Florida, to Junction, TX, to Tucson, AZ back to Junction, then on to Ely, NV for the start of the "Poison" Rally  Over 90% of the route are on Interstate highways with the remainder on major US roads.  State Road Conditions:  FL, AL, MS, LA, TX, NM, AZ, NV

Ride Pace -- The key to successful long distance riding is a steady pace.  Greg will strive to maintain a consistent ride pace based on the legal speed limits, as adjusted for the flow of traffic and road conditions.  The ride pace takes into account time used for riding, pit stops and rest stops.  Good intel about current weather, ongoing construction, traffic and other issues will affect pace and navigation.   Greg has committed to a mandatory 4 hours of quality sleep each 24 hours, in a motel, at Junction, TX  (See -- Fatigue and Motorcycle Touring

Preparations: Like many in the LD community Greg keeps his motorcycle and gear it rally trim.   Greg whet through a major upgrade of his gear and equipment prior to the 2013 Iron Butt Rally.  Your can see the preparations Greg made to his Honda Goldwing, "The Machine"!  Things Greg did specifically to prepare for this BBG Trifecta + are listed below.

  • New Olympia AST 2 Hi-Viz jacket
  • New boots
  • New deerskin gloves
  • New LDComfort tights and top
  • Cleaned Aerostich AD1 riding pants
  • New tankbag setup, may mount a Microsoft Surface with GPS antenna
  • Changed air filter
  • Changed sparkplugs
  • New helmet faceshield and sun visor
  • Integrated the audio from the Garmin 2797 into the Gold Wing’s intercom system so I can hear the audio along with other GPS’s and radar detector and cell phone
  • Updated the maps on the GPS’s
  • Cleaned the Aerostich Hi-Viz tank panniers
  • New tires
  • Changed oil and filter
  • Changed rear gear lube

About the Rider:  Greg is regarded in the long distance community as a specialist of the BunBurner Gold, IBA challenge ride.  He already has 2 BBG Trifectas to his credit.  His riding adventures are number 1 on the Top Ten All Time SpotWalla Trips.   Listed below are Greg's IBA certified BBG challenge rides:
  • 2 Time finisher of the Iron Butt Rally with a top 10 Gold Podium finish in 2013
  • 2 BunBurner Gold Trifecta
  • 1 BunBurner 3,000
  • 13 BunBurner Gold 
Greg is committed to safe long distance riding.  He rides within his limits, the limits of his motorcycle and the limits of the riding environment.  He knows the risks of exceeding those limits and is committed actively managing the risks.   He is a well conditioned and an experienced long distance motorcycling athlete who appreciates training at the edges of his performance limits. 
So, if you want to learn more about long distance riding?  --  See the Iron Butt Association "Archive of Wisdom"


Wednesday, January 1, 2014

Static Display Data Sheet


HardTxRider
Tim Masterson, IBA # 415
HardTxRider@Yahoo.com
Hard Riding Adventures (Google it)


Tuesday, December 31, 2013

2013: A Year of Adventures

I knew 2013 was going to be a high mileage year.  I had lots riding goals to accomplish.  I started the year with 3,507 miles on my 2013 BMW R1200GS Adventure on January first.  On December 31st the odometer read 57,987 for a 2013 grand total of 54,480 miles.  I went through some tires during the year.  I have been running Michelin Anakee 3 tires since the first tire change after taking delivery of the GSA in October 2012.  The Anakee's are supposed to be high mileage adventure touring tires.  I'm still doing the evaluation of their performance and will post updates as I make them.

Risk management is something I work at while riding.  Riding many miles, on all types of highways, in all types of traffic conditions and in all types of weather I'm happy to report I had no "close calls" while riding during the year.  I define a close call by an instance of emergency maneuvering to avoid a crash after being surprised by a road or traffic condition. And, as far as riding and risk management goes acquiring, installing and using the FLIR PathFindIR thermal imaging system was one of my most important and innovative 'farkles'.  It was invaluable for riding dusk, night and before dawn.  Especially useful during the 10,000 Miles in 10 Days ride in Texas and on the  IBR.  Using the FLIR while riding helped me to detect and identify warm blooded critters way out of the reach of my driving lights.  I can't imagine riding between dusk and dawn without it.

Of course, my primary riding objective was achieving my goal for the 2013 Iron Butt Rally.  I had many training rides leading up to the IBR during the first half of the year and some therapeutic  P.I.S.S rides afterwards.  Listed below are some of the highlights of the riding adventures during the year.

January:
Using Proximity Point Alerts on the GPS
Big Bend Video Shoot
The Clock Is Running

March:
100ccc Gold Ride Plan
Ride Report -- 100ccc Gold

April:
LD Riding on the Clock -- An Organizing Framework
ROG -- Run Out of Gas Testing
Cape Fear 1,000 Rally

May:
Texas 10,000 Miles in 10 Days

July:
The Iron Butt Rally -- 11,000 Miles in 11 Days

August:
The Colorado 1,000 -- 2013

September:
Round Trip to Salt Lake City

October:
Big Tex Rally -- Posse Ride
IBA Big As Texas Party -- Republic of Texas 1,000

November:
Fun with Bubbler GPS Pro

2014 Is already shaping up to be a fun year.  I have applied for a position on the 2015 Iron Butt Rally.  If I am drawn for a slot I'll be doing several focused training events and rides to keep my riding skills sharp.  I am in the preliminary stages of planning a trans Canada ride with a comrade during August.  I want to ride my motorcycle from The farthest eastern city, St. John's NS to Vancouver BC.  That should be fun.  And, if drawn for a IBR slot, good Canada ride training.  The IBA International Meeting is taking place in Denver in August.  So, the plan is to head there at the end of the trans Canada adventure.  I'll keep my schedule open for more Hard Riding Adventures!

Saturday, November 16, 2013

Using FLIR While Riding

11/16/13:  I like technology.  What "guy" doesn't?  So, the idea of HUD (Head Up Display) for a motorcycle helmet is high on my cool list.

Check out this article in c/net about the Skully P1 motorcycle helmet.
And, the Nuviz Motorcycle Heads Up Display.
And, the LiveMap Motorcycle HMD


I want to tether my FLIR PathFindIR and rear view camera to a micro display affixed to the inside of my helmet.  Of course, having the feed from navigation would also be way cool.  But, right now I'd settle for using the display for rear view camera during the bright time of the day and the PathFindIR dusk till dawn.

Technology is getting closer. 


This post is about using the FLIR PathFindIR thermal imaging camera to enhance and extend perception distance while riding on a motorcycle.  See: The FLIR Project posting regarding the acquisition and installation on my BMW R1200GS Adventure.  

Rider view:  Using the FLIR in daylight, at dusk, slight overcast.  From this prospective you can see the FLIR display clearly.  Although, not captured by the video camera the resolution of the display is good enough to see the thermal signature of warm blooded critters on the sides of the road 8-12 seconds ahead.  Through practice and experimentation I have found the FLIR most useful by doing a quick glance at the display to a point that represents 6-12 seconds ahead.

(Select Full Screen and HD Quality)

FLIR Field Testing:   The objective of this phase is integrate the FLIR under long distance riding conditions.  How best to employ the system, exploit its capabilities, and identify limitations under day and night operational conditions.

Operational Environments:  Videos in both thermal and visible light spectra. (click on YouTube link when available)

Video Capture Methodology 
Listed above are or will be several videos showing how the FLIR can increase perception distance to gain advance notice of possible hazards on the path of travel.  Some demonstration videos will be a mix of both day and night riding conditions.  There are two types of videos, 1; showing how the road ahead looks from the rider's view and 2; of the thermal image captured by an in-line DVR.  Edited into the DVR recordings will be using visible light rider view, provided by the motorcycle's OEM lighting, captured by GoPro Hero3 action camera using low light settings.  The Hero3 is mounted on top of the FLIR housing to match the prospective views.  This technique provides both visible light and thermal spectrum.

Using the FLIR PathFindIR thermal imagery while riding works differently than using just axillary lighting.  The primary advantage of using FLIR over axillary lighting is thermal contrast. The FLIR system does not detect the "temperature" difference the way a thermometer registers degrees.  Rather, the PathFindIR camera captures the differences in the frequency of the electromagnetic spectrum in the infrared ranges

To detect objects the human visual system looks for object signatures which differentiates it from the background.  The term visual salience is used in cognitive science to describe the features that make objects detectable.

The size of the “difference” with the background must become higher than a “threshold value” before the object becomes salient, or in other words, draws attention.  In terms of naturally camouflage animals, consider the following attributes that have traditionally been mentioned that help one to detect an animal hazard in the riding environment.

Visual Salience

  1. Movement – shapes moving in a static environment or not moving in a dynamic environment will draw attention. 
  2. Shine from reflective surfaces – Eye reflection of animals at night..
  3. Shape – humanoid and animal shapes draw attention
  4. Silhouette – a contrasting blob against the background.
  5. Color and texture – natural camouflage and animal surface textures are hard to detect especially at night.
  6. Shadow – the mind can calculate probable shapes from the shadows cast – especially human and to a lesser degree animal shapes.
  7. Spacing – regular spaced objects form a pattern that will draw attention.
Thermal imagery facilitates detection by inducing readily detectable contrast into the natural background.  By highlighting the infrared signature of animals against the neutral background detection of hazards is significantly enhanced.
---------------------------------------------------------------------------------------------------------------------------------
Night Riding Basics:
Riding at night poses a special problem for motorcyclists.  Reduced visibility ahead increases the possibility of striking something in the intended path of travel.   Debris on the road, or worse, an animal if struck can result in severe injury, possible death.

It takes training and purposeful practice to reduce the risks of riding at night or under less than ideal visual conditions like fog, heavy rain, smoke or dust.   Using the MSF Rider Radar concept helps to prioritize one's attention while riding.  The table below is how I prioritize the threat for hazards ahead:

  Threat Zone                                           Threat Level
Distance Ahead                 Path of Travel                       Shoulder Margins

      2 Seconds                         Extreme                                High
      4 Seconds                         High                                      Medium
      6 Seconds                         Medium                                 Low
     12 Seconds                        Low                                       Low

Anything in the 4 second immediate path of travel must be dealt with.  A moving hazard anywhere in the 4 second range can quickly become a High threat.  The maneuver choices are reduce speed and/or swerving around the hazard.  The objective is to see hazards before it gets within the total stopping distance of the motorcycle.  Specifically, perception distance, reaction distance and braking distance.  Purposeful practice can reduce reaction distance and a well maintained motorcycle can reduce braking distance.  The FLIR PathFindIR is designed to enhance and extend the perception distance.

Perception distance is how many seconds ahead a potential hazard is recognized.  Under ideal conditions during the day it is possible to see 10 to 12 seconds ahead.  At 60 MPH 15 seconds ahead is one quarter mile.  At night or under less than ideal conditions seeing only 4-6 seconds ahead is the norm.  Sometimes using auxiliary lighting may extend this to 8 seconds.  But these bright lights, like the high beam, must be turned off for approaching traffic. The FLIR PathFindIR can extend this perception distance out to as much as 15 seconds.  And, provides a white hot thermal image of warm blooded hazards within 4-8 seconds ahead.


Wednesday, October 23, 2013

57,000 Miles of Hard Riding Adventures

It's been one year since I took delivery on the 2013 BMW R1200GS Adventure.  What a year of riding adventures it has been.

Besides accumulating a bunch of miles I managed to accomplish many of my ride goals this year.  The over arching goal I had for this rider year was to successfully complete my second Iron Butt Rally.  This goal tended to focus my riding efforts and activities.  Since the IBR I have been working on the ride report.  Instead of rushing to publish my musings about the Rally I thought I'd take my time over the winter months to do a more thorough job.


Listed below, in reverse order, are the Hard Riding Adventures for the last 57,000 miles.


October 2013:
September 2013:
August 2013:

July 2013:

May 2013:

April 2013:

March 2013:

January 2013:

December 2012:

November 2012:


Wednesday, May 1, 2013

Published Articles

These are the published articles of interest to the long distance community that I have written.  They appeared in "IRON BUTT" magazine, the official publication of The Iron Butt Association.

Forward Looking Infrared for Long Distance Riders, page 30Also, check out my blog postings on FLIR:  The FLIR Project - Research, acquisition and installation.  Using FLIR While Riding - Hazard ID and detection techniques.
50cc Quest Gold Ride - Honoring George Wyman "The Hard Way", page 40.  Check out my blog posting for:  The George Wyman Memorial 50cc Challenge

Friday, April 5, 2013

ROG -- Run Out of Gas Testing


The 2013 BMW R1200GS Adventure has a fuel rating of 51 MPG and a OEM stated fuel capacity of 8.7 US gallons.  Hardly anyone riding a BMW R1200GS gets that kind of MPG though.  Check out this cool site that tracks MPG by vehicle type:  Fuelly -- BMW R1200GS AdventureYMMV - Fuel consumption rate is dependent on many variables; sustained speeds, gross weight, wind direction, operating and rider characteristics.  Check out my Fuelly MPG states.

I'm doing some run out of gas testing on the GSA.  The purpose of this ROG testing is to determine the fuel endurance distance (FED) for a tank of fuel under differing ride pace conditions.  I define FED distance as 95% of the ROG distance.  See the testing method below.


Interstate highway 4/5 I-10, Boerne to near I-10/20 merge in west Texas
ROG Point/Stats

  • Speed limit - 80 MPH, moderate crosswinds to quartering headwinds, 70-80F
  • ROG Miles - 351 miles
  • Mvg Avg  - 79 MPH
  • Total gallons at fill up - 9.829 (9.069 + 0.760)
  • Notes - The GSA low fuel light came on at 274 miles.  I rode 41.6 miles past GSA fuel range indicating zero.  Distance from ROG point to Cherry Creek gas fill up was 8.6 miles.  I estimate I used a 0.240 gallon based on 35.7 MPG

US and State highways 4/6, US90 Alpine to Del Rio to Boerne via hill country roads
ROG Point/Stats

  • Speed limit(s) - 70-75 MPH, winds light, 60-70F
  • ROG Miles - 373 miles
  • Mvg Avg - 69 MPH
  • Total gallons at fill up - 9.856 (8.875 + 0.981)
  • Notes - The GSA low fuel light came on at 285 miles.  I rode 46.1 miles past GSA fuel range indicating zero.  Distance from ROG point to gas station was 1.7 miles.  I estimated I used 0.019 gallon based on 38.1 MPG

Secondary roads 4/10-13, Wimberley to Boerne to Wimberley via hill country roads
ROG Point/Stats

  • Speed limit(s) - 35-65 MPH, weather was not an issue.
  • ROG Miles - 421
  • Mvg Avg - 55 MPH
  • Total gallons at fill up - 9.767 (9.571 + .196)
  • Notes - The GSA low fuel light came on at 320 miles on the GPS odometer and the GSA trip computer indicated 42 mile "Range." I rode 57.2 miles after the "Range" indicated zero.  Distance from the ROG point to the gas station was 1.9 miles.  I estimated I used .044 gallon based on 43.1 MPG

100ccc Stats 3/17-21, I-10/12/8 JAX - SDO - JAX (On the clock)

  • Enroute Pit Stops = 13
  • Start/Mid/Finish Stops = 3
  • Fuel Stops at Rest Stops = 3
  • Fuel used Start to Finish =  131.8 gallons (133.393 total minus start fill up of 1.593 gallons)
  • Miles per gallon for event = 35.9 (4,735.1 GPS miles divided by 131.8 gallons)
  • Highest/lowest MPG = 44.4 and 31.7
  • Farthest fuel load distance = 341.1 miles
  • Highest amount pumped = 8.831 gallons
  • Total fuel costs = $533.56 (High $4.40, low $3.69 and average $4.01 per gallon)
Notes  After arriving home from the JAX dinner and 100ccc on Friday 3/22 the GSA indicated 21 miles left till zero on the fuel range counter. Today, 2/28, I fill up a quart sized MSR fuel bottle and got on the motorcycle to run out of gas.  This is my first ROG on the new GSA.  When the GSA Fuel range gauge hit zero I started an odometer on the GPS.  I was riding on I-35 at interstate speeds to burn up what was left in the tank after the ride back from Jacksonville.  By the time the motorcycle experienced complete fuel exhaustion I had traveled another 43.4 miles.  By this time I was doing a turn around via frontage roads off the interstate and pulled into the parking lot of a motel.  I could see an Exxon station less than a 1/4 mile away.  I poured the 0.25 gallons of gas from the MSR fuel bottle and rode to the Exxon.  There I put another 9.584 gallons into the tank.  That's a total of  over 9.8 gallons of fuel.  This is good information.  I will be confirming this with more ROG tests in the next couple of weeks.  I'll do a blog posting to document the results of this fuel endurance distance testing on the new bike.

Methodology:

During these tests the GSA is in near rally trim as far as vehicle weight is concerned.  Tires pressure is at normal rally trim riding pressures of 38 front and 44 rear when cold.  I note the wind direction to take into account effect on the test results.  This is usually not a big effect unless it is strong head or tail winds.

For each ROG category I start with filling the GSA normally, on the side stand, filled to within 2 inches of top of the filler neck.   I put one gallon into an gas container to use at the ROG point.  I'm careful to put just one gallon into the approved container so making the calculation of total gas added at the post ROG fill up more accurate.

Then, I zero the two MC trip meters.  On the zumo 665 I zero out the trip settings; max speed, moving and overall average MPH, odometer, riding and stopped time.  Though, I'm primarily interested in just two of these data points; Moving Avg MPH and Odometer. 

I maintain a normal riding pace for the speed limit and flow of traffic.  The idea is to duplicate my normal operational (on the clock) pace for the type of highway.  When the low fuel indicator/range activates on the GSA I take s screen shot of the GPS to document the odometer/Mvg Avg/fuel countdown data.   When the GSA fuel "Range" number goes to "--------" I zero one of the second GSA trip meter to track how many miles the bike traveled after showing zero "Range".  This also helps me calculate the fuel used from the ROG point to the fill up gas station to more accurately determine total fuel added.  At the ROG point I do a screen shot to document odometer and moving average data.

Applying this method across the different highway configurations helps compare FED among the various riding conditions I will experience doing rallies and the IBR in particular.  The Interstate Highway ROG data is the most significant as it represents the shortest FED I should experience while on the clock.  I will use this FED as my GPS fuel countdown distance.

Wednesday, December 12, 2012

The FLIR PathFindIR Project

Forward Looking Infrared:  A thermal imaging technology designed to literally see in the dark.  Ideal for night riding on a motorcycle. (Posts are in reverse chronological order)

FLIR PathFindIR

This the last entry of this post.   See:  Using FLIR While Riding  The objective of this phase is integrate the FLIR under long distance riding conditions.  How best to employ the system, exploit its capabilities, and identify limitations under day and night operational conditions. 

Tuesday 12/18:  Ok, I have finalized all the placement issues with components, cables and wires.  One last thing on my FLIR farkle list is to fabricate a front cover for the camera mounting assembly.  The FLIR PathFindIR camera is already ruggedized to a high degree.  Placing an aluminum cover on the front of the mounting hardware will give more protection and disguise the camera.
 
Sunday 12/16:  This morning before dawn I rode to Gruene Harley Davidson for the last day of the New Rider Course I was conducting.  It was drizzling so I was excited to see how the FLIR looked in the rain.  The first thing I noticed is the lack of contrast between the trees, road, and other non warm blooded objects.  As you would expect from a cool shower of rain the ambient heat of most objects that were covered by the cool rain lost a lot of their thermal energy.  But, on Purgatory road I saw several hot spots on the side of the road some distance ahead.  When my headlights brought the objects in view I could see it was several rabbits.  They dispersed as my motorcycle approached.   In the absence of warm blooded critters the FLIR display in the rain is very grainy to the point of looking a malfunction.  But all it takes is something with some thermal energy and it comes alive.

Friday 12/14:  Installed the new rear view camera.  Much better in the bright sunlight.  It's a black/white camera but I actually prefer that over the color camera.  I'm working on a way to record video from the FLIR.  I've been scouring the internet for a mini DVR for 12v application or battery powered.  I'd like to record videos for the blog using the FLIR under various conditions; night riding, heavy rain, fog, on the Interstate, etc.  With the bike parked in my garage I recorded a video using my Canon PowerShot 495 rally camera.  The video of the monitor displaying the FLIR input is  grainy of course because the motorcycle is sitting still.  Something I've discovered about the FLIR PathFindIR is that it adjusts it's resolution dynamically as any camera.  But, if it is sitting still it doesn't change the resolution until something moves in view. This is a video viewing the FLIR monitor mounted on my BMW R1200GS Adventure.  As you watch me walk down my driveway to the street you can clearly see me against the cool background.  When I reach the street I walk a bit, turn around and head back.  When you see me waving my arms I"m actually standing behind the brush.  It's quite dramatic how easy it is to see warm blooded creatures using the FLIR PathFindIR thermal imaging camera.


Wednesday 12/12:  Today I wired up the two BMW power sockets on each side of the upper fairing.  So, now the FLIR and the monitor have their own dedicated power supply.  It really made a difference in the resolution of the FLIR.  It is much clearer with what seems to be enhanced resolution.  I'm very please with the setup now.  I put an in-line toggle switch for the FLIR power socket so I can turn it off during periods of bright sunlight.  It still works perfectly in bright sunlight but the monitor is not easy to see.  Besides, no need for a heat signature during the bright of day.  Now, I'm ready for some serious field work with the FLIR. I want to test it in heavy rain, fog and other conditions where poor visibility impedes riding.  Yesterday, I was at AlTex electronics store in Austin and saw a nice weatherproof black and white CCTV camera that I might try for the rear view during the day.  The cheap ($29) back up camera I now have tends to suffer in bright sunlight. 

Tuesday 12/11:  I talked with my BMW tech and decided not to have them install power sockets into the CAN bus system of the motorcycle.  If for some reason one of the outlets pulls more than 4 amps all sockets will be disabled.  So, back to my original plan to connect the sockets up to the Touratech CAN bus helper I already have installed.  It's very reliable and easy to configure for various power requirements on the bike. 

Monday 12/10:  Removed the camera and the monitor from the motorcycle.  I'm having Lone Star BMW install power outlets wired into the CAN bus system on the motorcycle.  This will provide a system monitored power source for each component of the FLIR system.  The FLIR camera draws only 2 watts under normal use and a maximum of 6 watts when the heater activates at 40F.  The monitor consumes a maximum of 4 watts.  Also, I'll be installing BMW power plugs on the FLIR and the monitor.  This will make removing the unit quick and easy. 


Saturday 12/8:  Went on a early morning (pre-dawn) ride to see how the FLIR performed after the heat of the previous day had normalized overnight.  It was a noticeable difference.  I saw several deer on the side of the road ahead.  The contract between the cooler surroundings and the white hot bodies of the animals was striking.  It was very easy to see animal heat signatures at a distance far beyond all the lights I have on the GSA.  I'm sold.

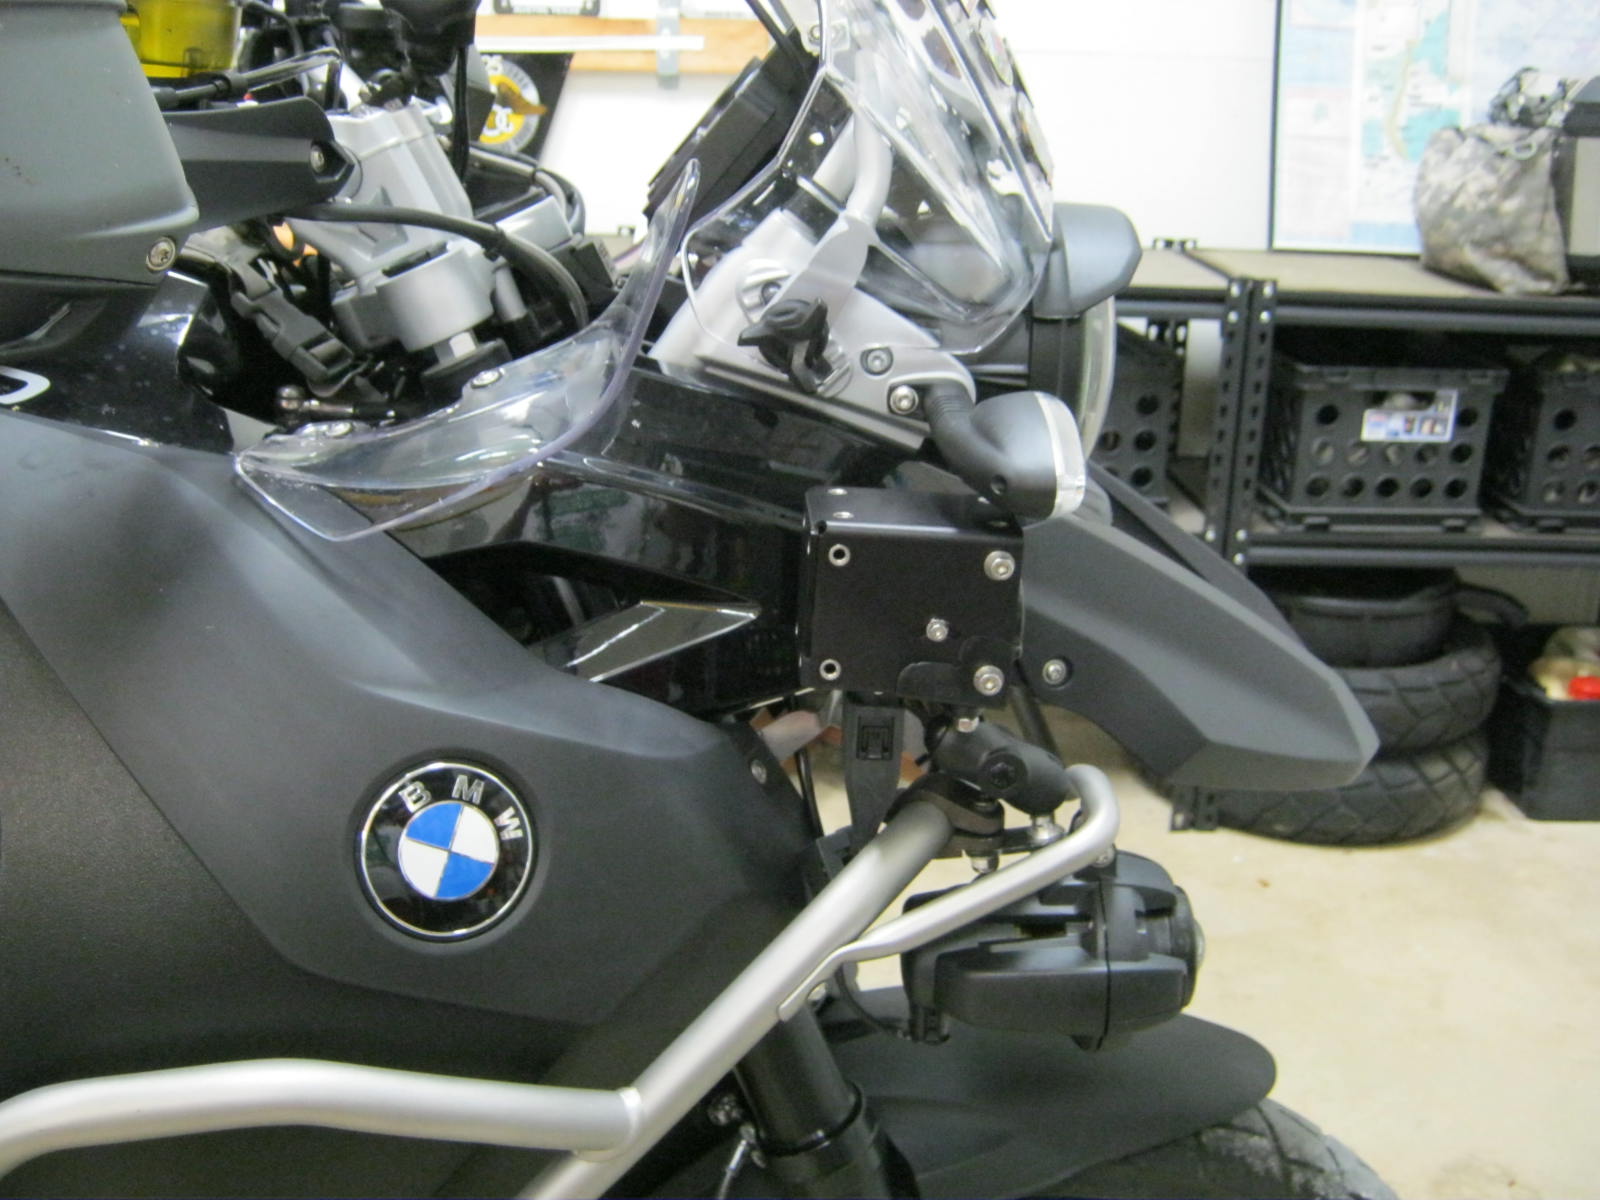
Wednesday 12/5:  Received the mounting hardware for the camera.  Placed just under the right turn signal the unit is at an optimum height above the ground.  It is securely attached to the brush guard via RAM ball and yoke.  I did a test ride to verify position and sturdiness and everything checked out OK. 


I also repositioned the display by raising it about one in more it my field of view.  This makes quick glances at the thermal image easier and I don't feel I'm taking my eyes off of the road ahead.


Monday 12/3:  Went on a training ride starting at dusk.  I live in the Texas Hill Country so it's a great place to practice avoiding critters.  The FLIR camera works well in all lighting conditions.  Remember, it registers the difference in heat generated by the natural and man made surroundings.  But, the display monitor is a limiting factor during bright sunlight.  At dusk or during an overcast sky the display becomes more useful.  My monitor has brightness/contrast settings that can be adjusted for daytime riding.  At dusk and riding at night I found that cranking down the b/c to a 10 setting works best. 

The threat while riding at night is not seeing a hazard before it gets within the total stopping distance of the motorcycle.  Normal headlights and high beam gives me about 5-6 seconds of lead time.  If I installed expensive auxiliary lighting it would extend this path of travel distance to about 8-10 seconds.  These bright lights should not be used with other vehicles are present as the lights can dazzle other drivers.  I have found the FLIR gives me a 12-15 second view ahead.  At 60 mph a 15 second view ahead is 1/4 mile.  It's difficult to see a naturally camouflaged animal on the road or near the shoulder of the road.  But with the FLIR they stand out like they are painted with white retro-reflective coating.  Very easy to spot even if they are several yard off to the side of the road.  Seeing the threat at that distance with just a quick glance at the monitor allows me to focus on the 4-6 second immediate path of travel to avoid hazards.  The more I use the FLIR the better I like it for night riding. 


Sunday 12/2:  Spent most of the day shortening the 6' monitor cable.  I was hoping the video cables were just like the RG174 cable on the FLIR.  Not!  The coaxial cables on the monitor were tiny 18 gauge wires with even smaller inner casing with the video lead.  I had to strip the outer casing off to expose the ground wire mesh, and solder the two grounds together.  Then solder the video lead wires to the cable segments that contained the BNC connectors.  I know, to much jargon.  At any rate it was a challenge for me.  But I got it done.  I am not happy with the power supply arrangement I have now for the FLIR and the monitor.  I have them both connected to a single power lead back to the CANBUS helper.  Tuesday I'm going to contact my BMW dealer and have them install two BMW power outlets in the upper fairing locations.  And, have the one on the riders right connected to an on/off switch.  I'm going to use that power socket for the FLIR and turn it off during the day. 

Saturday 12/1:  Today I hooked up the rear view camera to the monitor to use for day time use.  I also purchased a RG174 cable stripper to make adjustments to the OEM cables for better fitment and waterproofing.   RG174 is very thin coax cable and putting connections on the ends is trick without the right tools.  I'm going to shorten the video and power cables/wires to neaten up the project.  As it stands now I have already shortened the FLIR PathFindIR 20' OEM cable harness to 4'.  The monitor wiring harness is 6' long, so, it will be my first modification. 

Friday 11/30:  At the Best Western in Apline sipping on a cup of morning coffee.   Just a little about my impressions riding with the FLIR.  I first wanted to evaluate the stability of the mounting configuration.  Both the camera and the monitor are very stable.  I did not notice any screen vibration from the video input.  I have the camera mounted on RAM to the brush guards and it seems rock solid.  Also, the monitor is very steady and easy to view.  Speaking of viewing the monitor, it is slightly below my forward field of view.  Normally, looking down and anything creates stress about not keeping an eye on the road.  But looking at the monitor even for more than a second was not stressful as I was viewing the path of travel ahead.

The resolution is good but degraded in bright sunlight even with the contrast/brightness maxed out.  With just a little cloud cover the view improves.  Now, starting at dusk the view is dramatic and quite useful.  On I-10 I could clearly see the heat signature of vehicles 1/2 mile ahead.  They appeared as white dots and the shape became recognizable at a 1/4 mile.  After dusk and while on US67 heading into Alpine is when the FLIR really proved its worth.  With just a glance I could see features on the shoulders of the road ahead that would indicate animal activity.  Backing the brightness down made natural shapes stand out vividly.  At one point I noticed several hot spots on the right far ahead of my driving lights.   I watched these hot spots until they became visible in my headlights.  They were several cows laying in the grass just on the other side of the highway fence.

It will take me more field testing under varying riding conditions to train myself to get the most out of the FLIR.  But, this I notice right away while riding at night using the FLIR.  My stress level decreased noticeably.  I was able to maintain the speed limits and feel confident I would be alerted to animals ahead well in advance of seeing via my driving lights.  It was easy to check out the road, shoulders and behind trees and bushes on the monitor long before I could see them with visible light.

Headed north to New Mexico and turned right in Carlsbad.  Wanted to eat up some daylight to give the FLIR some more night time riding.  Specifically, I wanted to do some non-Interstate roads.  And what better place than the interior of Texas between I-20 and I-10.  Got dark when I arrived in Brady, about 3 hours away from home.  Stopped for gas, a sandwich and change into night riding glasses.  Adjusted the brightness/contrast on the FLIR and headed out.  The best settings I found for brightness/contrast are 10/5 respectfully on the monitor.  This gives the best view at night.  In addition to the ability to see the critters on the road, shoulders and on the adjacent field I found looking at the monitor screen when approaching vehicles and I pass each other.  I used to just look off to the right side to reduce the glare.  I often worried about hitting something just as I and the vehicle coming in the opposite direction pass.  Looking at the infrared display gave me a clear view of the road ahead.

I get better at using the FLIR with each ride.  I found that when I glance down at the monitor I should focus in the road at the point where my headlights stop.  This helps me to see if a critter is in the road on my path of travel.  By doing this I can also monitor the shoulder margins on each side of the road for the tell-tale white hot blobs of deer on the sides of the road.  This gives me more than a 10 second path of travel view with just a half-second glance at the monitor.  The last hour of riding was through some of the most critter infested parts of the Texas Hill Country:  Fredricksburg to Luckenbach to Blanco to Wimberley.  I would never ride this very familiar stretch at night and would choose the larger US290 to US281 highways instead.  The FLIR made is a lot less stressful.  I was a good training ride.

Thursday 11/29:  Today I'm going to neaten up the rat's nest of cables.  Yesterday, I had to have the 20 foot camera cable harness shortened to 4'.  That still leaves me with 6' monitor cable harness for a total of 10' of cables that needed to be securely and cosmetically stored.  I have temporary mounting hardware for the camera I fabricated out of a metal used for framing straps.  I works but is ugly.  I ordered the universal mounting bracket that was designed for the camera.

I'm going to begin field testing today.  I want to evaluate the ergonomics of the monitor, camera and the new position of my primary GPS.  Also, I want to evaluate the functionality of the FLIR through varying light conditions and the transition from daylight through dusk and into darkness.  I need to do this under actual extended riding conditions so I'll be heading out west.   

Wednesday 11/28:  I received both the FLIR PathFindIR camera and the mounting hardware for the monitor yesterday.  Spend most of the day working on mounting the monitor to the windscreen supports of the GSA.  I purchased a GPS mount from Touratech to attach to the top mounting bolts of the monitor and a couple of insulated clamps and support rods for the bottom mounting bolts.  As you can see by the finish product it actually looks quite OK, at least better than I expected.  I did have to switch from a 6" RAM extension to a 4" to lower my zumo 665 to take it out of the line of sight to the monitor.  The picture below is from the rider position which shows both the monitor and the GPS unit.  The view is out the door of the garage up the driveway. If you look in the lower right corner of the right picture you can see the FLIR mounted just below the right turn signal.


Sunday 11/25:  I've been occupied over the Thanksgiving holiday period scoping out and doing dry fitting of the different components that make up the FLIR project.  My plan is to mount the FLIR camera just over the right front fog light.  I have already run the power cable from the CAN Bus helper to the front of the motorcycle.  This single (pos&neg) cable will "Y" at the end to power both the monitor (2 watts) and the FLIR camera (2 watts and 6 watts when defroster activates at 39F).  The monitor power wire has an inline 3 amp fuze and I expect the FLIR camera will have something around that also.  So, if I do my electrical math correctly with both the camera and monitor pulling their max wattage it will be less than 3 amps.  (2w + 6w) / 12 volts = 0.667 amps. 

Tuesday 11/20:  Found an inexpensive rear view camera to add functionality to the FLIR Project.  It's the Boyo Vision VTK-350 universal rear viewing camera with a wide viewing angle.  It's supposed to be waterproof, but one customer review complained of his getting wet.  Installing this camera on the back of the GSA will give me a rear view while riding during the day.  The monitor I have is capable of doing split screen or toggle between cameras on the fly. 

Monday 11/19:  The monitor arrived this morning.  Wow, that was fast.  I placed the order on Friday 11/6.  I'm very please with Rugged CCTV, a Texas company. I did some quick dry fitting of the monitor and like most farkles it will require solving several problems.  But I'm excited to have one of the components of the project to play with while I wait on the camera.  Oh, this particular monitor can receive input from two cameras and display the two images in split screen.  Hummm....wonder how a review view camera would help me watch my "Six"?

Friday 11/16:
As a long distance rider I do a lot of riding at night.  The conventional solution to enhancing visibility at night is the auxiliary lighting.  These lighting systems can bathe the countryside with lots of light.  Of course one has to dim them for approaching vehicles.  Just when they are needed the most in some cases.  I have decided a different approach to increasing visibility for night riding.

With the PathFindIR FLIR camera feeding a thermal image to a waterproof 7" TFT LCD monitor I will be able to see the heat signature of animals, people, vehicles parked with their engines running up to 1,000 feet ahead, day or night.  As with most technologies there are limitations.   And, my prototype configuration uses a relatively large monitor.  My goal is an inside helmet mounted display similar to the Recon Instruments MODE Live goggle mounted display. 

I have used FLIR technology while serving in the US Army.  Our aviation assets employed FLIR tech for all kinds of applications.  So, when the technology migrated over to the civilian market I was keen to try a system out on a motorcycle.  After several months of research, justifying the cost and specing out system this week I purchased the camera and a waterproof (IP69) monitor.  The monitor will be mounted several inches below my normal field of view.  The idea is to use the monitor as one would use a rear view mirror by just glance at it every few seconds.

I purchased the camera from FLIR authorized dealer for the standard market price.  There are few if any companies that discount the item as it is tightly controled by FLIR.  The name of the dealer is The Midnight Rider.  I paid the current market price for the black & white 30 Hertz model.  This is the same unit that is in the US Army M1 Abrams main battle tank.  It's battle tested and ready for the motorcycling environment.

Check back to see the acquisition, installation and field testing.