I knew 2013 was going to be a high mileage year. I had lots riding goals to accomplish. I started the year with 3,507 miles on my 2013 BMW R1200GS Adventure on January first. On December 31st the odometer read 57,987 for a 2013 grand total of 54,480 miles. I went through some tires during the year. I have been running Michelin Anakee 3 tires since the first tire change after taking delivery of the GSA in October 2012. The Anakee's are supposed to be high mileage adventure touring tires. I'm still doing the evaluation of their performance and will post updates as I make them.
Risk management is something I work at while riding. Riding many miles, on all types of highways, in all types of traffic conditions and in all types of weather I'm happy to report I had no "close calls" while riding during the year. I define a close call by an instance of emergency maneuvering to avoid a crash after being surprised by a road or traffic condition. And, as far as riding and risk management goes acquiring, installing and using the FLIR PathFindIR thermal imaging system was one of my most important and innovative 'farkles'. It was invaluable for riding dusk, night and before dawn. Especially useful during the 10,000 Miles in 10 Days ride in Texas and on the IBR. Using the FLIR while riding helped me to detect and identify warm blooded critters way out of the reach of my driving lights. I can't imagine riding between dusk and dawn without it.
Of course, my primary riding objective was achieving my goal for the 2013 Iron Butt Rally. I had many training rides leading up to the IBR during the first half of the year and some therapeutic P.I.S.S rides afterwards. Listed below are some of the highlights of the riding adventures during the year.
2014 Is already shaping up to be a fun year. I have applied for a position on the 2015 Iron Butt Rally. If I am drawn for a slot I'll be doing several focused training events and rides to keep my riding skills sharp. I am in the preliminary stages of planning a trans Canada ride with a comrade during August. I want to ride my motorcycle from The farthest eastern city, St. John's NS to Vancouver BC. That should be fun. And, if drawn for a IBR slot, good Canada ride training. The IBA International Meeting is taking place in Denver in August. So, the plan is to head there at the end of the trans Canada adventure. I'll keep my schedule open for more Hard Riding Adventures!
I want to tether my FLIR PathFindIR
and rear view camera to a micro display affixed to the inside of my
helmet. Of course, having the feed from navigation would also be way
cool. But, right now I'd settle for using the display for rear view
camera during the bright time of the day and the PathFindIR dusk till
dawn.
Technology is getting closer.
This post is about using the FLIR PathFindIR thermal imaging camera to enhance and extend perception distance while riding on a motorcycle. See: The FLIR Project posting regarding the acquisition and installation on my BMW R1200GS Adventure.
Rider view: Using the FLIR in daylight, at dusk, slight overcast. From this prospective you can see the FLIR display clearly. Although, not captured by the video camera the resolution of the display is good enough to see the thermal signature of warm blooded critters on the sides of the road 8-12 seconds ahead. Through practice and experimentation I have found the FLIR most useful by doing a quick glance at the display to a point that represents 6-12 seconds ahead.
(Select Full Screen and HD Quality)
FLIR Field Testing: The objective of this phase is integrate the FLIR under long distance riding conditions. How best to employ the system, exploit its capabilities, and identify limitations under day and night operational conditions.
Operational Environments:Videos in both thermal and visible light spectra. (click on YouTube link when available)
Video Capture Methodology
Listed above are or will be several videos showing how the FLIR can increase perception distance to gain advance notice of possible hazards on the path of travel. Some demonstration videos will be a mix of both day and night riding conditions. There are two types of videos, 1; showing how the road ahead looks from the rider's view and 2; of the thermal image captured by an in-line DVR. Edited into the DVR recordings will be using visible light rider view, provided by the motorcycle's OEM lighting, captured by GoPro Hero3 action camera using low light settings. The Hero3 is mounted on top of the FLIR housing to match the prospective views. This technique provides both visible light and thermal spectrum.
Using the FLIR PathFindIR thermal imagery while riding works differently than using just axillary lighting. The primary advantage of using FLIR over axillary lighting is thermal contrast. The FLIR
system does not detect the "temperature" difference the way a
thermometer registers degrees. Rather, the PathFindIR camera captures
the differences in the frequency of the electromagnetic spectrum in the infrared ranges.
To
detect objects the human visual system looks for object signatures
which differentiates it from the background. The term visual salience
is used in cognitive science to describe the features that make objects
detectable.
The size of the “difference” with the
background must become higher than a “threshold value” before the object
becomes salient, or in other words, draws attention. In terms of
naturally camouflage animals, consider the following attributes that
have traditionally been mentioned that help one to detect an animal hazard in the riding environment.
Movement – shapes moving in a static environment or not moving in a dynamic environment will draw attention.
Shine from reflective surfaces – Eye reflection of animals at night..
Shape – humanoid and animal shapes draw attention
Silhouette – a contrasting blob against the background.
Color and texture – natural camouflage and animal surface textures are hard to detect especially at night.
Shadow – the mind can calculate probable shapes from the shadows cast – especially human and to a lesser degree animal shapes.
Spacing – regular spaced objects form a pattern that will draw attention.
Thermal imagery facilitates detection by inducing readily detectable contrast
into the natural background. By highlighting the infrared signature of
animals against the neutral background detection of hazards is
significantly enhanced.
--------------------------------------------------------------------------------------------------------------------------------- Night Riding Basics:
Riding at night poses a special problem for motorcyclists. Reduced visibility ahead increases the possibility of striking something in the intended path of travel. Debris on the road, or worse, an animal if struck can result in severe injury, possible death.
It takes training and purposeful practice to reduce the risks of riding at night or under less than ideal visual conditions like fog, heavy rain, smoke or dust. Using the MSF Rider Radar concept helps to prioritize one's attention while riding. The table below is how I prioritize the threat for hazards ahead:
Threat ZoneThreat Level Distance AheadPath of TravelShoulder Margins
2 Seconds Extreme High
4 Seconds High Medium
6 Seconds Medium Low
12 Seconds Low Low
Anything in the 4 second immediate path of travel must be dealt with. A moving hazard anywhere in the 4 second range can quickly become a High threat. The maneuver choices are reduce speed and/or swerving around the hazard. The objective is to see hazards before it gets within the total stopping distance of the motorcycle. Specifically, perception distance, reaction distance and braking distance. Purposeful practice can reduce reaction distance and a well maintained motorcycle can reduce braking distance. The FLIR PathFindIR is designed to enhance and extend the perception distance.
Perception distance is how many seconds ahead a potential hazard is recognized. Under ideal conditions during the day it is possible to see 10 to 12 seconds ahead. At 60 MPH 15 seconds ahead is one quarter mile. At night or under less than ideal conditions seeing only 4-6 seconds ahead is the norm. Sometimes using auxiliary lighting may extend this to 8 seconds. But these bright lights, like the high beam, must be turned off for approaching traffic. The FLIR PathFindIR can extend this perception distance out to as much as 15 seconds. And, provides a white hot thermal image of warm blooded hazards within 4-8 seconds ahead.
It's been one year since I took delivery on the 2013 BMW R1200GS Adventure. What a year of riding adventures it has been.
Besides accumulating a bunch of miles I managed to accomplish many of my ride goals this year. The over arching goal I had for this rider year was to successfully complete my second Iron Butt Rally. This goal tended to focus my riding efforts and activities. Since the IBR I have been working on the ride report. Instead of rushing to publish my musings about the Rally I thought I'd take my time over the winter months to do a more thorough job.
Listed below, in reverse order, are the Hard Riding Adventures for the last 57,000 miles.
These are the published articles of interest to the long distance community that I have written. They appeared in "IRON BUTT" magazine, the official publication of The Iron Butt Association.
Forward Looking Infrared: A thermal imaging technology designed to literally see in the dark. Ideal for night riding on a motorcycle. (Posts are in reverse chronological order)
FLIR PathFindIR
This the last entry of this post. See: Using FLIR While RidingThe objective of this phase is integrate the FLIR under long distance
riding conditions. How best to employ the system, exploit its
capabilities, and identify limitations under day and night operational
conditions.
Tuesday 12/18: Ok, I have finalized all the placement issues with components, cables and wires. One last thing on my FLIR farkle list is to fabricate a front cover for the camera mounting assembly. The FLIR PathFindIR camera is already ruggedized to a high degree. Placing an aluminum cover on the front of the mounting hardware will give more protection and disguise the camera.
Sunday 12/16: This morning before dawn I rode to Gruene Harley Davidson for the last day of the New Rider Course I was conducting. It was drizzling so I was excited to see how the FLIR looked in the rain. The first thing I noticed is the lack of contrast between the trees, road, and other non warm blooded objects. As you would expect from a cool shower of rain the ambient heat of most objects that were covered by the cool rain lost a lot of their thermal energy. But, on Purgatory road I saw several hot spots on the side of the road some distance ahead. When my headlights brought the objects in view I could see it was several rabbits. They dispersed as my motorcycle approached. In the absence of warm blooded critters the FLIR display in the rain is very grainy to the point of looking a malfunction. But all it takes is something with some thermal energy and it comes alive.
Friday 12/14: Installed the new rear view camera. Much better
in the bright sunlight. It's a black/white camera but I actually prefer
that over the color camera. I'm working on a way to record video from
the FLIR. I've been scouring the internet for a mini DVR
for 12v application or battery powered. I'd like to record videos for
the blog using the FLIR under various conditions; night riding, heavy
rain, fog, on the Interstate, etc. With the bike parked in my garage I recorded a video using my Canon PowerShot 495 rally camera. The video of the monitor displaying the FLIR input is
grainy of course because the motorcycle is sitting still. Something
I've discovered about the FLIR PathFindIR is that it adjusts it's
resolution dynamically as any camera. But, if it is sitting still it
doesn't change the resolution until something moves in view. This is a video viewing the FLIR monitor mounted on my BMW R1200GS Adventure. As you
watch me walk down my driveway to the street you can clearly see me
against the cool background. When I reach the street I walk a bit, turn
around and head back. When you see me waving my arms I"m actually
standing behind the brush. It's quite dramatic how easy it is to see
warm blooded creatures using the FLIR PathFindIR thermal imaging camera.
Wednesday 12/12: Today I wired up the two BMW power sockets on each side of the upper fairing. So, now the FLIR and the monitor have their own dedicated power supply. It really made a difference in the resolution of the FLIR. It is much clearer with what seems to be enhanced resolution. I'm very please with the setup now. I put an in-line toggle switch for the FLIR power socket so I can turn it off during periods of bright sunlight. It still works perfectly in bright sunlight but the monitor is not easy to see. Besides, no need for a heat signature during the bright of day. Now, I'm ready for some serious field work with the FLIR. I want to test it in heavy rain, fog and other conditions where poor visibility impedes riding. Yesterday, I was at AlTex electronics store in Austin and saw a nice weatherproof black and white CCTV camera that I might try for the rear view during the day. The cheap ($29) back up camera I now have tends to suffer in bright sunlight.
Tuesday 12/11: I talked with my BMW tech and decided not to have them install power sockets into the CAN bus system of the motorcycle. If for some reason one of the outlets pulls more than 4 amps all sockets will be disabled. So, back to my original plan to connect the sockets up to the Touratech CAN bus helper I already have installed. It's very reliable and easy to configure for various power requirements on the bike.
Monday 12/10: Removed the camera and the monitor from the motorcycle. I'm having Lone Star BMW install power outlets wired into the CAN bus system on the motorcycle. This will provide a system monitored power source for each component of the FLIR system. The FLIR camera draws only 2 watts under normal use and a maximum of 6 watts when the heater activates at 40F. The monitor consumes a maximum of 4 watts. Also, I'll be installing BMW power plugs on the FLIR and the monitor. This will make removing the unit quick and easy.
Saturday 12/8: Went on a early morning (pre-dawn) ride to see how the FLIR performed after the heat of the previous day had normalized overnight. It was a noticeable difference. I saw several deer on the side of the road ahead. The contract between the cooler surroundings and the white hot bodies of the animals was striking. It was very easy to see animal heat signatures at a distance far beyond all the lights I have on the GSA. I'm sold.
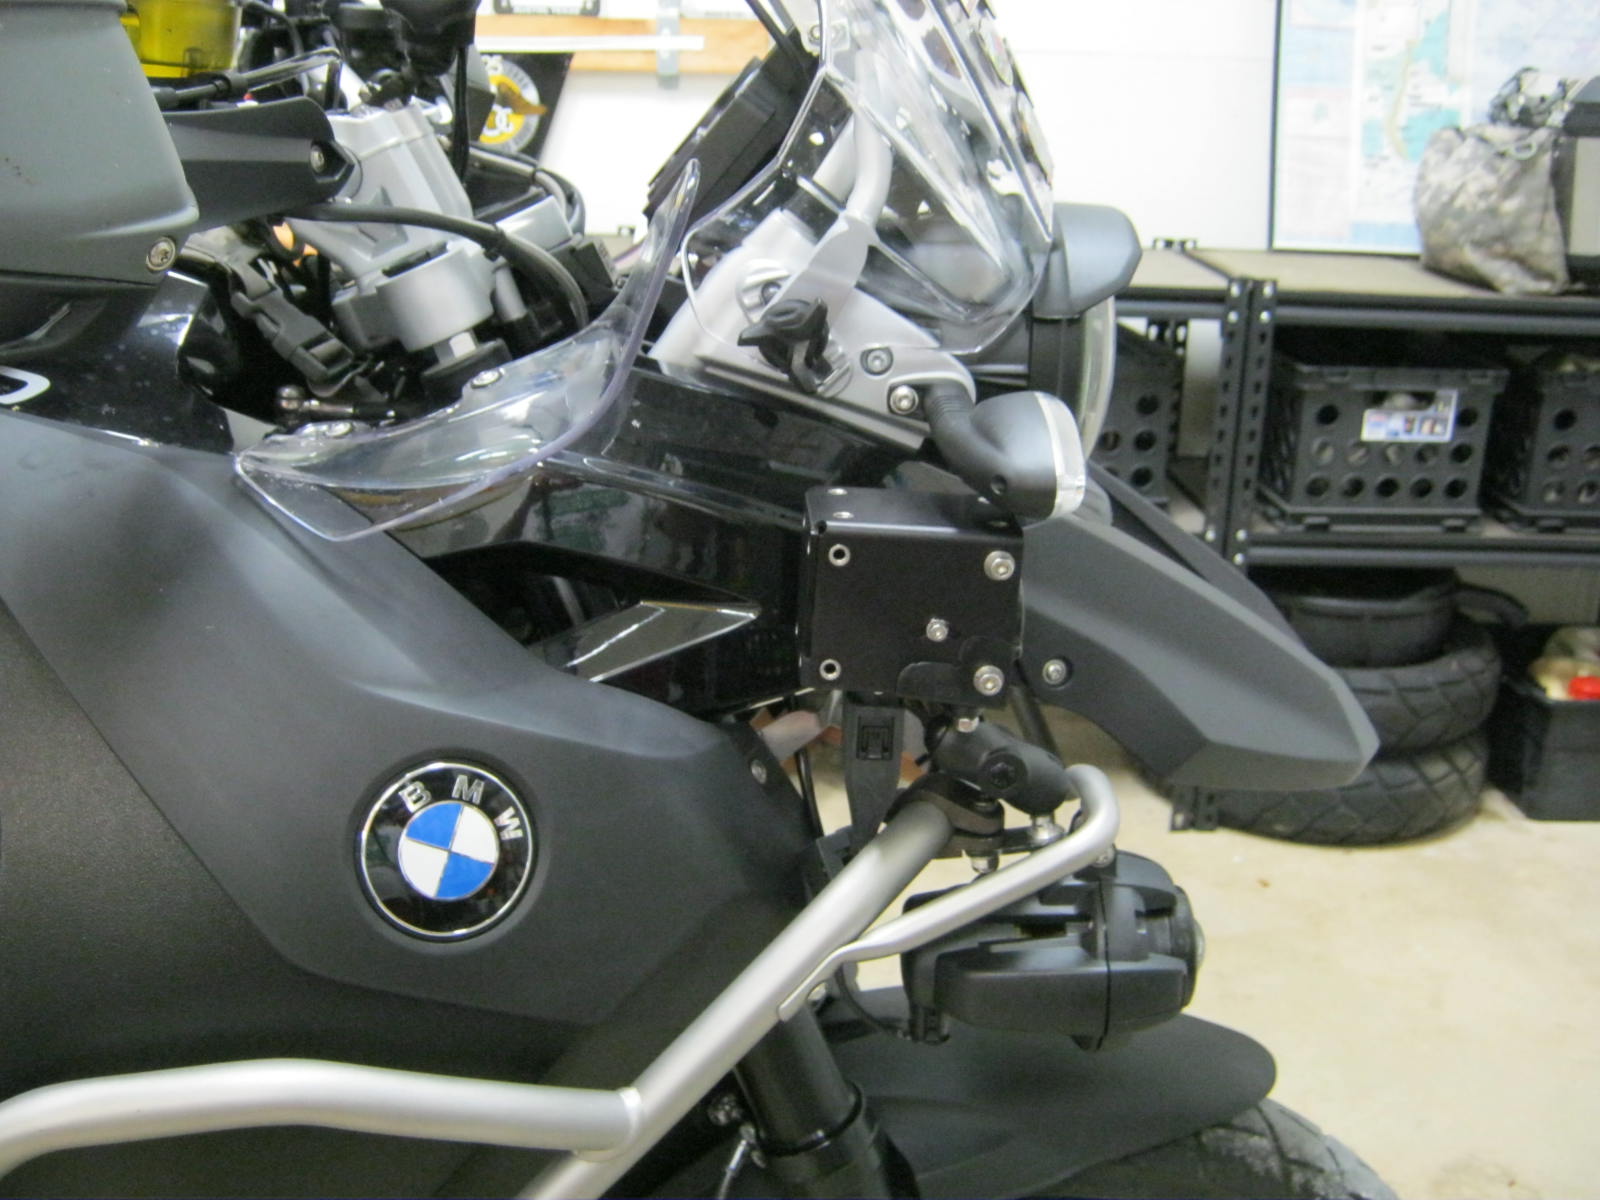
Wednesday 12/5: Received the mounting hardware for the camera. Placed just under the right turn signal the unit is at an optimum height above the ground. It is securely attached to the brush guard via RAM ball and yoke. I did a test ride to verify position and sturdiness and everything checked out OK.
I also repositioned the display by raising it about one in more it my field of view. This makes quick glances at the thermal image easier and I don't feel I'm taking my eyes off of the road ahead.
Monday 12/3: Went on a training ride starting at dusk. I live in the Texas Hill Country so it's a great place to practice avoiding critters. The FLIR camera works well in all lighting conditions. Remember, it registers the difference in heat generated by the natural and man made surroundings. But, the display monitor is a limiting factor during bright sunlight. At dusk or during an overcast sky the display becomes more useful. My monitor has brightness/contrast settings that can be adjusted for daytime riding. At dusk and riding at night I found that cranking down the b/c to a 10 setting works best.
The threat while riding at night is not seeing a hazard before it gets within the total stopping distance of the motorcycle. Normal headlights and high beam gives me about 5-6 seconds of lead time. If I installed expensive auxiliary lighting it would extend this path of travel distance to about 8-10 seconds. These bright lights should not be used with other vehicles are present as the lights can dazzle other drivers. I have found the FLIR gives me a 12-15 second view ahead. At 60 mph a 15 second view ahead is 1/4 mile. It's difficult to see a naturally camouflaged animal on the road or near the shoulder of the road. But with the FLIR they stand out like they are painted with white retro-reflective coating. Very easy to spot even if they are several yard off to the side of the road. Seeing the threat at that distance with just a quick glance at the monitor allows me to focus on the 4-6 second immediate path of travel to avoid hazards. The more I use the FLIR the better I like it for night riding.
Sunday 12/2: Spent most of the day shortening the 6' monitor cable. I was hoping the video cables were just like the RG174 cable on the FLIR. Not! The coaxial cables on the monitor were tiny 18 gauge wires with even smaller inner casing with the video lead. I had to strip the outer casing off to expose the ground wire mesh, and solder the two grounds together. Then solder the video lead wires to the cable segments that contained the BNC connectors. I know, to much jargon. At any rate it was a challenge for me. But I got it done. I am not happy with the power supply arrangement I have now for the FLIR and the monitor. I have them both connected to a single power lead back to the CANBUS helper. Tuesday I'm going to contact my BMW dealer and have them install two BMW power outlets in the upper fairing locations. And, have the one on the riders right connected to an on/off switch. I'm going to use that power socket for the FLIR and turn it off during the day.
Saturday 12/1: Today I hooked up the rear view camera to the monitor to use for day time use. I also purchased a RG174 cable stripper to make adjustments to the OEM cables for better fitment and waterproofing. RG174 is very thin coax cable and putting connections on the ends is trick without the right tools. I'm going to shorten the video and power cables/wires to neaten up the project. As it stands now I have already shortened the FLIR PathFindIR 20' OEM cable harness to 4'. The monitor wiring harness is 6' long, so, it will be my first modification.
Friday 11/30: At the Best Western in Apline sipping on a cup of morning coffee. Just a little about my impressions riding with the FLIR. I first wanted to evaluate the stability of the mounting configuration. Both the camera and the monitor are very stable. I did not notice any screen vibration from the video input. I have the camera mounted on RAM to the brush guards and it seems rock solid. Also, the monitor is very steady and easy to view. Speaking of viewing the monitor, it is slightly below my forward field of view. Normally, looking down and anything creates stress about not keeping an eye on the road. But looking at the monitor even for more than a second was not stressful as I was viewing the path of travel ahead.
The resolution is good but degraded in bright sunlight even with the contrast/brightness maxed out. With just a little cloud cover the view improves. Now, starting at dusk the view is dramatic and quite useful. On I-10 I could clearly see the heat signature of vehicles 1/2 mile ahead. They appeared as white dots and the shape became recognizable at a 1/4 mile. After dusk and while on US67 heading into Alpine is when the FLIR really proved its worth. With just a glance I could see features on the shoulders of the road ahead that would indicate animal activity. Backing the brightness down made natural shapes stand out vividly. At one point I noticed several hot spots on the right far ahead of my driving lights. I watched these hot spots until they became visible in my headlights. They were several cows laying in the grass just on the other side of the highway fence.
It will take me more field testing under varying riding conditions to train myself to get the most out of the FLIR. But, this I notice right away while riding at night using the FLIR. My stress level decreased noticeably. I was able to maintain the speed limits and feel confident I would be alerted to animals ahead well in advance of seeing via my driving lights. It was easy to check out the road, shoulders and behind trees and bushes on the monitor long before I could see them with visible light.
Headed north to New Mexico and turned right in Carlsbad. Wanted
to eat up some daylight to give the FLIR some more night time riding.
Specifically, I wanted to do some non-Interstate roads. And what better
place than the interior of Texas between I-20 and I-10. Got dark when I
arrived in Brady, about 3 hours away from home. Stopped for gas, a
sandwich and change into night riding glasses. Adjusted the
brightness/contrast on the FLIR and headed out. The best settings I
found for brightness/contrast are 10/5 respectfully on the monitor.
This gives the best view at night. In addition to the ability to see
the critters on the road, shoulders and on the adjacent field I found
looking at the monitor screen when approaching vehicles and I pass each
other. I used to just look off to the right side to reduce the glare. I
often worried about hitting something just as I and the vehicle coming
in the opposite direction pass. Looking at the infrared display gave me
a clear view of the road ahead.
I get
better at using the FLIR with each ride. I found that when I glance
down at the monitor I should focus in the road at the point where my
headlights stop. This helps me to see if a critter is in the road on my
path of travel. By doing this I can also monitor the shoulder margins
on each side of the road for the tell-tale white hot blobs of deer on
the sides of the road. This gives me more than a 10 second path of
travel view with just a half-second glance at the monitor. The last hour of riding was through some of the most critter infested
parts of the Texas Hill Country: Fredricksburg to Luckenbach to Blanco
to Wimberley. I would never ride this very familiar stretch at night and would choose the larger US290 to US281 highways instead. The FLIR made is a
lot less stressful. I was a good training ride.
Thursday 11/29: Today I'm going to neaten up the rat's nest of cables. Yesterday, I had to have the 20 foot camera cable harness shortened to 4'. That still leaves me with 6' monitor cable harness for a total of 10' of cables that needed to be securely and cosmetically stored. I have temporary mounting hardware for the camera I fabricated out of a metal used for framing straps. I works but is ugly. I ordered the universal mounting bracket that was designed for the camera.
I'm going to begin field testing today. I want to evaluate the ergonomics of the monitor, camera and the new position of my primary GPS. Also, I want to evaluate the functionality of the FLIR through varying light conditions and the transition from daylight through dusk and into darkness. I need to do this under actual extended riding conditions so I'll be heading out west.
Wednesday 11/28: I received both the FLIR PathFindIR camera and the mounting hardware for the monitor yesterday. Spend most of the day working on mounting the monitor to the windscreen supports of the GSA. I purchased a GPS mount from Touratech to attach to the top mounting bolts of the monitor and a couple of insulated clamps and support rods for the bottom mounting bolts. As you can see by the finish product it actually looks quite OK, at least better than I expected. I did have to switch from a 6" RAM extension to a 4" to lower my zumo 665 to take it out of the line of sight to the monitor. The picture below is from the rider position which shows both the monitor and the GPS unit. The view is out the door of the garage up the driveway. If you look in the lower right corner of the right picture you can see the FLIR mounted just below the right turn signal.
Sunday 11/25: I've been occupied over the Thanksgiving holiday period scoping out and doing dry fitting of the different components that make up the FLIR project. My plan is to mount the FLIR camera just over the right front fog light. I have already run the power cable from the CAN Bus helper to the front of the motorcycle. This single (pos&neg) cable will "Y" at the end to power both the monitor (2 watts) and the FLIR camera (2 watts and 6 watts when defroster activates at 39F). The monitor power wire has an inline 3 amp fuze and I expect the FLIR camera will have something around that also. So, if I do my electrical math correctly with both the camera and monitor pulling their max wattage it will be less than 3 amps. (2w + 6w) / 12 volts = 0.667 amps.
Tuesday 11/20: Found an inexpensive rear view camera to add functionality to the FLIR Project. It's the Boyo Vision VTK-350 universal rear viewing camera with a wide viewing angle. It's supposed to be waterproof, but one customer review complained of his getting wet. Installing this camera on the back of the GSA will give me a rear view while riding during the day. The monitor I have is capable of doing split screen or toggle between cameras on the fly.
Monday 11/19: The monitor arrived this morning. Wow, that was fast. I placed the order on Friday 11/6. I'm very please with Rugged CCTV, a Texas company. I did some quick dry fitting of the monitor and like most farkles it will require solving several problems. But I'm excited to have one of the components of the project to play with while I wait on the camera. Oh, this particular monitor can receive input from two cameras and display the two images in split screen. Hummm....wonder how a review view camera would help me watch my "Six"?
Friday 11/16:
As a long distance rider I do a lot of riding at night. The conventional solution to enhancing visibility at night is the auxiliary lighting. These lighting systems can bathe the countryside with lots of light. Of course one has to dim them for approaching vehicles. Just when they are needed the most in some cases. I have decided a different approach to increasing visibility for night riding.
With the PathFindIR FLIR camera feeding a thermal image to a waterproof 7" TFT LCD monitor I will be able to see the heat signature of animals, people, vehicles parked with their engines running up to 1,000 feet ahead, day or night. As with most technologies there are limitations. And, my prototype configuration uses a relatively large monitor. My goal is an inside helmet mounted display similar to the Recon Instruments MODE Live goggle mounted display.
I have used FLIR technology while serving in the US Army. Our aviation assets employed FLIR tech for all kinds of applications. So, when the technology migrated over to the civilian market I was keen to try a system out on a motorcycle. After several months of research, justifying the cost and specing out system this week I purchased the camera and a waterproof (IP69) monitor. The monitor will be mounted several inches below my normal field of view. The idea is to use the monitor as one would use a rear view mirror by just glance at it every few seconds.
I purchased the camera from FLIR authorized dealer for the standard market price. There are few if any companies that discount the item as it is tightly controled by FLIR. The name of the dealer is The Midnight Rider. I paid the current market price for the black & white 30 Hertz model. This is the same unit that is in the US Army M1 Abrams main battle tank. It's battle tested and ready for the motorcycling environment.
Check back to see the acquisition, installation and field testing.